 NIXIE CLOCK DIY

You can find this enclosure from our ebay store.
Please check the links on the right-top of this webpage to visit.
Specifications(For reference only):
Enclosure Size:90mm(L)*66mm(W)*24mm(H)
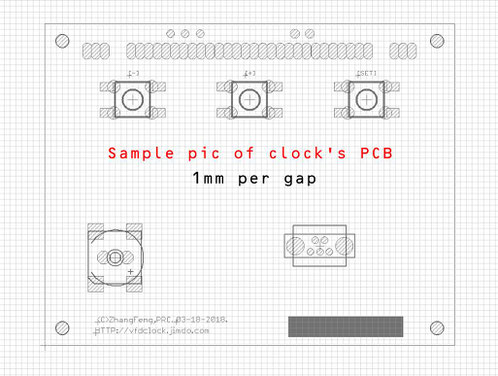
Before you start to assemble the enclosure,please double check the 1mm gap pic of PCb on the pic to see if your VFD48 clock FITs,99% of our vfd48 clock PCB are all fit with no problem,the buzzer beep-hole may face to top-side or left-side,all work.
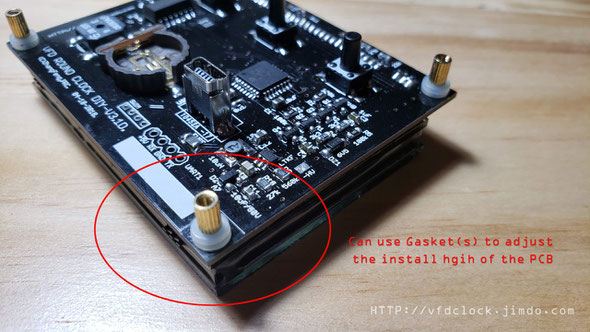
First install the 5mm Copper column with 2pcs plastic gaskets as shown on the pic, Do not scrow too tight,may need adjust the distance a little bit when plug in the enclosure.
!!! Total high of the bottom side of the PCB is :
5mm(Copper column)+1mm(gasket)+1mm(gasket)=7mm;
Because of we do not know how high you have installed the VFD48 clock panel,you can install only 1pcs or none of the gaskets to make sure that when the vfd48 clock PCB be installed inside the enclosure, you can still install the acrylic panel on with no problem,and all 3pcs of buttons can be pressed on the back side.
Plug the VFD48 clock PCB in the enclosure,make sure all 4pcs of Copper column be plugged inside the 4 holes. If all fine,you can add a little bit of epoxy in the 4 holes to glue the Copper column inside the enclosure, and then wait untill the epoxy becomes solid.
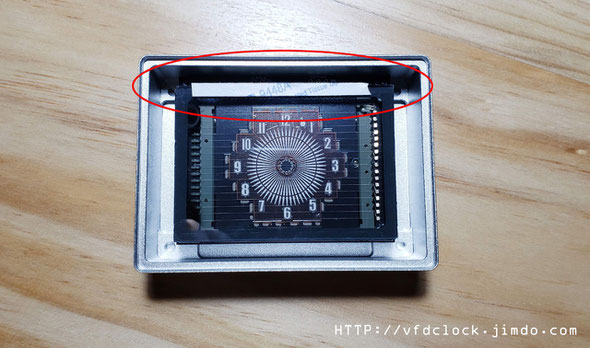
Then glue a short of paragraph transparent double-side tape on the top edge of the clock panel,as you can see in the picture,we will need to glue the blue filter in next step.

The blue filter contains protective film on both side,remove it before you use it.Then glue the blue filter on the VFD48 panel.
Tips:In some of version,you can also try to glue the blue filter on the middle of the front panel.

Now you can install the front panel. On the back side of the front pancel contains Double-side tap to glue the pancel on the enclosure,and after be installed,you can remove the protective film on the front side.
