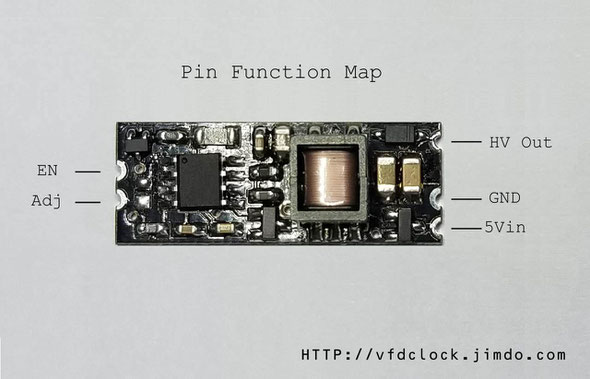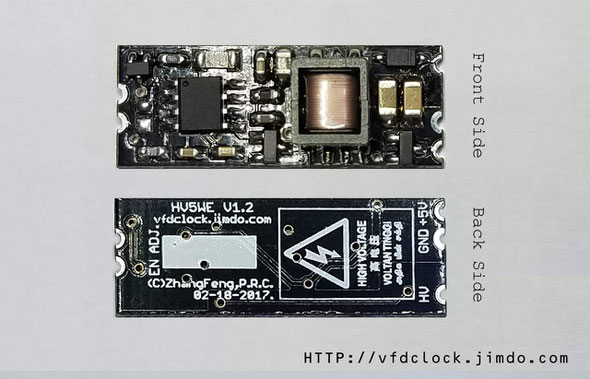
If have any questions ,you can contact us: zjjszhangf@gmail.com
And you need to have SMD soldering skill to assemble this KIT!
The newest design:
Vin=3V3~12V;
Vout= max 200V adjustable output;
(Add an extern resistor on PCB or connect outside the module for adjusting.)
En Pin for turning the Module On or OFF with 3V3, 5V or even 12V Logic signal range;
Std. 0.1# gap of PINS,you can install it on PCB as a small height SMD module;
Small Size, 2.85Cm*1.1Cm*0.55Cm(H), can light up 6~8pcs IN-12(IN-14) or 3pcs IN-18 at the same time with 3.7V Li battery or 5V USB power,you get almost no heat for 24*7 working condition;
For the people who can solder the SMD components, will have a KIT version for you to assemble the module by yourself.
For the assembly Instructions,check blow.


HV5W-E USB Powered
DC-DC HV Module for NIXIE Clock
Assembly Instructions
V1.0

zjjszhangf@gmail.com
HTTP://vfdclock.jimdo.com
Notice
For assembling the HV5W-E clock you need to have the skill of soldering SMD components. We use a Hakko FX-888 Soldering Station (with CF2 Iron Head) and a Hot air blower station. We use 183℃(degree C)low melt temperature solder wire S60, 0.5mm(Dia.), Brand Almit.
For how to solder the SMD components, we recommend:
https://www.hakko.com/english/tip_selection/type_bc_c.html
https://www.hakkousa.com/video/
Please do not change any equipments of the KIT or you may not be able to get the module working.
If already have the skill of soldering the SMD components, it is easy for you to assemble the KIT, please check the circuit diagram carefully and follow the steps shown blow.
Because of this module is small size module and contains few components, if you solder it carefully, it is very easy to be assembled, and no need debug. Please solder all the components and double check it before power on test.
For more info & update, please visit
HTTP://vfdclock.jimdo.com
Or contact us: zjjszhangf@gmail.com
Thanks for choosing our product.

Preparing
1. Please print out the PCB installation diagram by yourself, the Circuit diagram is no need for soldering job, print it or not depends on you(Note: May only have the paper circuit diagram in the KIT with no digital version provide.);
2. Check all the components in the kit bag, make sure nothing is missing (You can do this on a A4 white copy paper);
3. We recommend using a soldering station and small soldering tip for soldering this kit (we use F2 or CF2 type tip). If you have a hot air gun(or Hot air blower station) tool for soldering, that will be great. We recommend using ~180℃ type soldering tin for this job. Please do not use the high temperature soldering tin in this project, you may damage a lot of SMD components or the PCB;

Identifying the parts of your kit
The following guide should help you to identify the parts and assemble it successfully.
Well, because of the circuit is very simple, we recommend you solder the main SO8 driver chip first, please double check it's direction, do not go invert.
Then solder all the capacitors, please control the temperature or the capacitor will be damaged.
The 0603 caps have two types (1uf and 1nf), please check carefully;
and 1 PCS 0805 size capacitor is 47uF/25V;
it also has 2 PCS 1206 big size capacitors are 1uF/250V; This 1206 type of capacitors are connected in parallel, we recommend you solder one only before debugging. Because if the output HV lost control when in the first power on test, you just damage one output cap not two.
Most of the resistors are also in 0603(or 0805) small size; The [R1] resistor is optional, if just manna create a constant out put 165V module for nixie clock instead of the output adjustable module, you do not need to solder this resistor.
and 1 PCS 1206 big size resistor is 1M;
All the resistors have the mark on its' surface, please check it before you solder it on PCB.
The triodes are easy, please take care of ESD free, and check the marks on its' surface.
The only one diode is [D1/E1J], it needs to take care of the direction, do not solder it invert.
The transformer has 2-3 pins structure, will not go invert.but you need to take care of it ,because of the magnetic core is easy to be crashed when dropping.
 NIXIE CLOCK DIY
